
How to Create a SharePoint Site Template with Web Parts
We all know Modern SharePoint is limited in what it can do out of the box, despite the quality of its available features – sometimes you have to look on the outside for what you need, or even develop a custom webpart.
It doesn't help that Site Designs are a thing of the past either! A lot of people liked the functionality they had, but they've recently been replaced by templates. And while there are amazing templates available from Microsoft itself, if you want to make your own template you actually can't have a predesigned layout of the webparts. At least, not without considerable effort.
In today's guide, I want to show you how to set up a template with your desired webparts, so that you can have a uniform look across as many pages as you like, by using only PowerShell and Power Automate.
The Power Automate Flow - Getting the Layout You Want
While the mention of PowerShell might be a little scary, it's actually the easiest part of this tutorial – we'll get to that a bit further down. But you first need a Power Automate flow that will do all the webpart setup for you.
This is how it works in theory: SharePoint pages have a property named CanvasContent1 which is the property that describes all the webparts and their position on a page. For best results, I recommend doing a proper page where you can get the layout from, then calling the SharePoint API to extract the CanvasContent1 column.
To do that, you just need a flow that does something like the below:
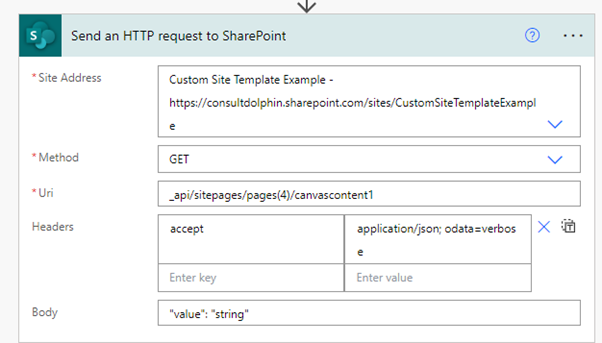
Where the 4 is the ID of the page. Then, you add a step to Parse JSON:
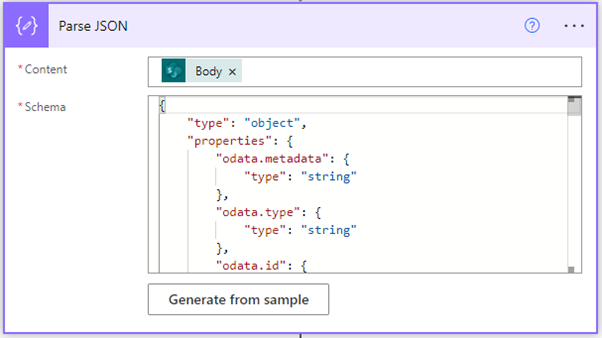
{ "type": "object", "properties": { "odata.metadata": { "type": "string" }, "odata.type": { "type": "string" }, "odata.id": { "type": "string" }, "odata.editLink": { "type": "string" }, "AbsoluteUrl": { "type": "string" }, "AuthorByline": {}, "BannerImageUrl": {}, "BannerThumbnailUrl": {}, "CallToAction": { "type": "string" }, "Categories": {}, "ContentTypeId": { "type": "string" }, "Description": {}, "DoesUserHaveEditPermission": { "type": "boolean" }, "FileName": { "type": "string" }, "FirstPublished": { "type": "string" }, "Id": { "type": "integer" }, "IsPageCheckedOutToCurrentUser": { "type": "boolean" }, "IsWebWelcomePage": { "type": "boolean" }, "Modified": { "type": "string" }, "PageLayoutType": { "type": "string" }, "Path": { "type": "object", "properties": { "DecodedUrl": { "type": "string" } } }, "PromotedState": { "type": "integer" }, "Title": {}, "TopicHeader": {}, "UniqueId": { "type": "string" }, "Url": { "type": "string" }, "Version": { "type": "string" }, "VersionInfo": { "type": "object", "properties": { "LastVersionCreated": { "type": "string" }, "LastVersionCreatedBy": { "type": "string" } } }, "AlternativeUrlMap": { "type": "string" }, "CanvasContent1": { "type": "string" }, "LayoutWebpartsContent": {}, "SitePageFlags": { "type": "string" } }}
And finally, add a HTML to Text step to get the result in HTML.
You can choose the trigger to be whatever you like – in my case I used Modify item.
Power Automate Flow - Setup For Template
This is the main part that will be doing all of the heavy lifting for us in terms of setting up the page layout.
Proceed with caution however, as we will be using a Premium connector, which comes with a fee. However, the good news is that you don't need a user license - there is a Pay as You Go option which is not too expensive and can be found on Microsoft's pricing page.
First, we'll set up a step to receive an HTTP request – this is called from the PowerShell script as one of the steps when applying the template.
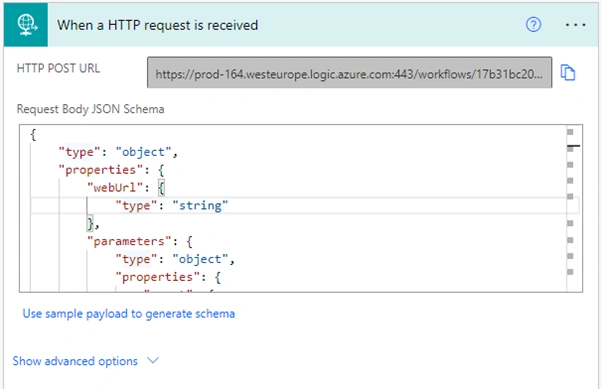
With the following body:
{ "type": "object", "properties": { "webUrl": { "type": "string" }, "parameters": { "type": "object", "properties": { "event": { "type": "string" }, "product": { "type": "string" } } }, "webDescription": { "type": "string" }, "creatorName": { "type": "string" }, "creatorEmail": { "type": "string" }, "createdTimeUTC": { "type": "string" } }}
This step is so that the Flow knows what site you're on when you click Apply Site Template.
ALL OF THE FOLLOWING STEPS OTHER THAN PARSE JSON ARE “SEND HTTP REQUEST TO SHAREPOINT”
Next, you can choose to create a new page or get the existing homepage via the SharePoint API. This will vary, so if you want a new page you would just execute this call a POST call:

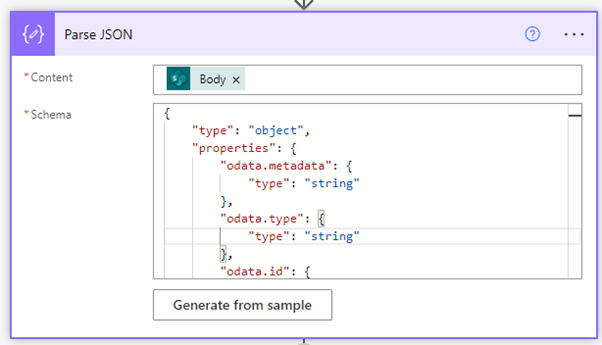
Then, we add a Parse JSON step again, with the same body as in the previous flow:
Now, remember our CanvasContent1 property? Set your next step as the below and copy it over:
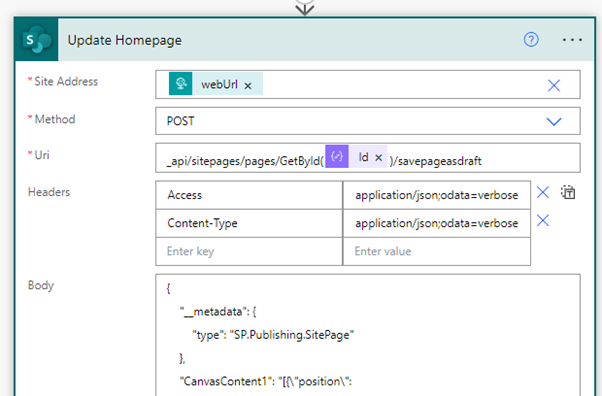
Now, remember our CanvasContent1 property? Set your next step as the below and copy it over:
"FileName": "NewPage.aspx", "Title": "New Page", "IsWebWelcomePage": true,
The previous step was just saving it as draft, so to publish it we use the following step:

And finally, if it's a new page, to set it as the Landing page:

And finally, if it's a new page, to set it as the Landing page:
The PowerShell Script
Now to put it all together.
You must be a SharePoint admin in order to execute the following scripts.
First, connect to SPO admin:

Then, set up the following.

The script that's being referred to is a separate file and will be the one that tells the Flow to start executing.
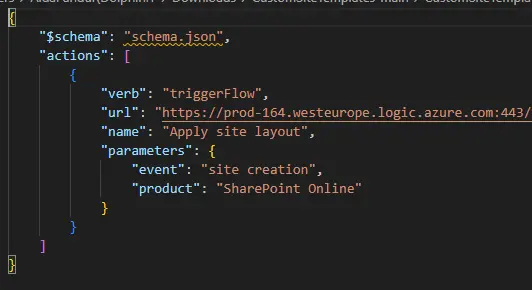
Where the URL is the URL of your flow.
You can also add many things in that script, such as applying a theme, removing and adding navigation links, and even creating lists – there are many possibilities!
Once the script has executed, when you go to a site and go to Apply a Template you should see something like this:
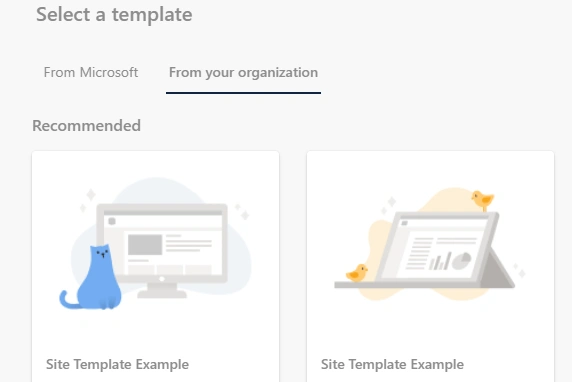
I hope this guide has helped you create your perfect template!


